

How To Change Your Wix Domain Name
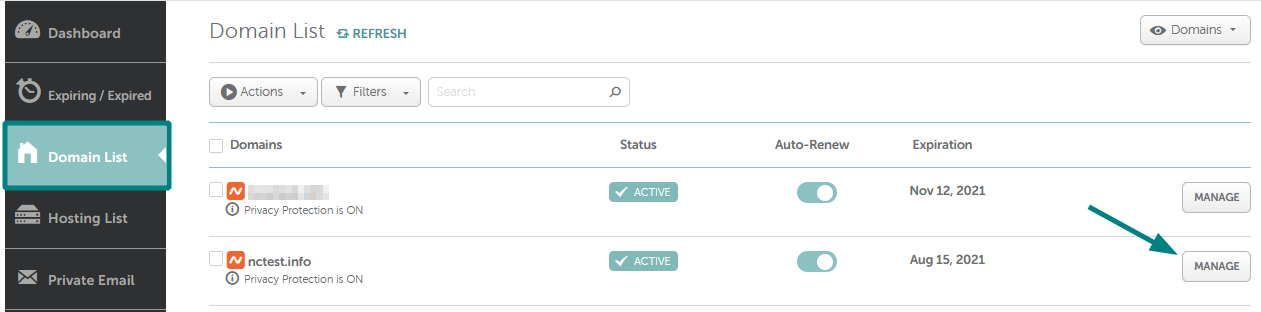
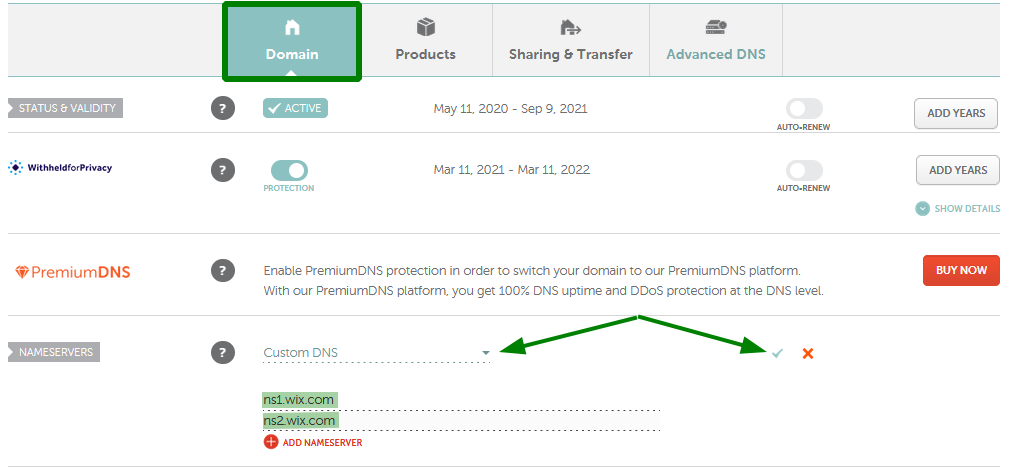
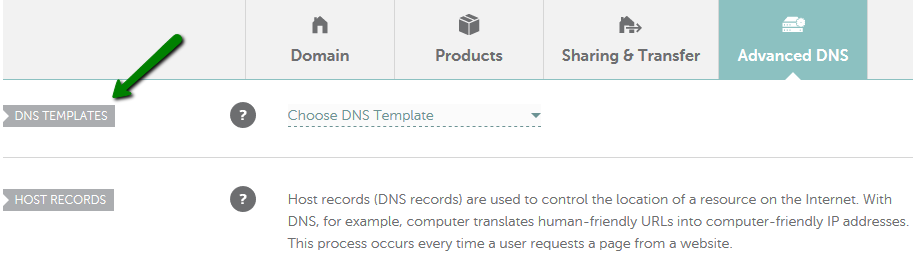
Important: Before you can connect a domain, your Wix site must be upgraded to a Premium Plan. There are three ways how you can point your domain registered with us to your website created with Wix - you can do it with the help of nameservers, using an IP address or our Wix DNS template. PLEASE NOTE: By default, Wix recommends choosing nameservers setup. Pointing a domain using nameservers 2. Sign in to your Namecheap account. 3. Select Domain List from the left sidebar and click on the Manage button next to your domain name: 4. Select the Custom DNS option from the drop-down for Nameservers and enter your Custom nameservers (you see in your Wix account) into the fields. Once done, make sure you click on the green checkmark to save the changes : NOTE: If you had an email service or other DNS records set, then you would need to re-configure them on the Wix's side. 2. Sign in to your Namecheap account. 3. Select Domain List from the left sidebar and click on the Manage button next to your domain name: 5. Configure the three records you see in your Wix account if you want to use a bare domain for your website, e.g. yourdomain.tld: 7. Go back to your Wix account to verify the domain connection (step 3). Pointing a domain using Wix DNS template setup This feature may be used if your domain name is pointed to our BasicDNS or PremiumDNS. PLEASE NOTE: By default, Wix recommends choosing nameservers setup. But no worries, you can still use our special Wix DNS template option. Just do not forget to make sure that Connection Type: Pointing is set on the Wix side. By the way, when applying Wix template, you do not need to wait for 24+ hours for the propagation completion as the settings will come into the effect within an hour only! Additionally, choosing the Wix DNS template you will be able to use our Free Email Forwarding feature. 3. Locate the Advanced DNS tab and select the DNS Templates section: 7. If these settings were properly applied, a "Success!" message will appear: If these settings were not properly applied, an "Error" message will appear: 8. Your successful domain name setup will then be shown with a Product label, which indicates the number of connected services: If you have any questions, feel free to contact our Support Team.

6. Click on the Save All Changes button once done. Normally, it takes 30 minutes for newly created records to take effect.
4. From the drop-down menu, choose the Wix option: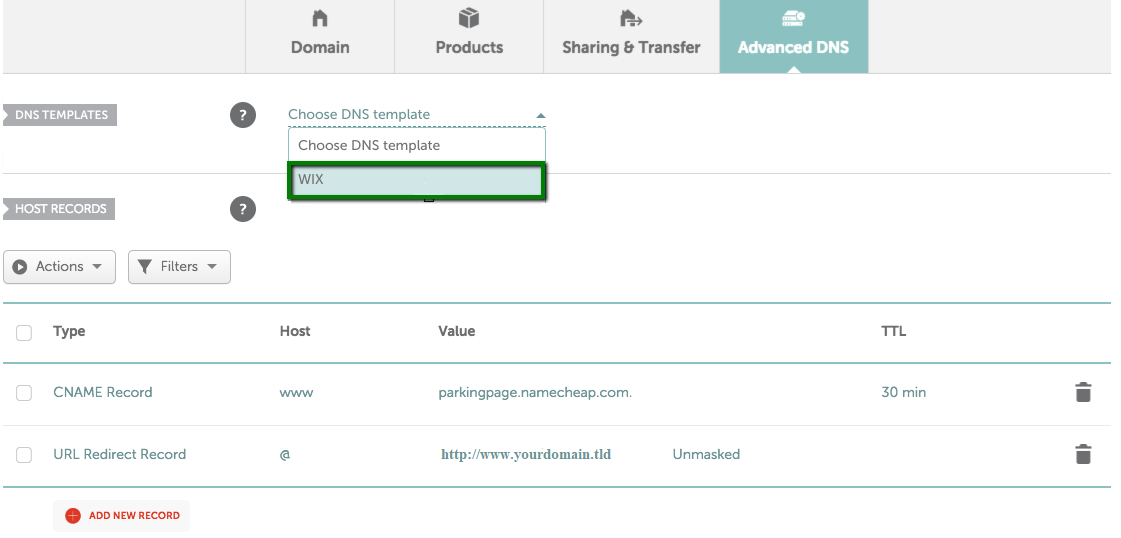
5. Once chosen, click on the green checkmark to save these changes: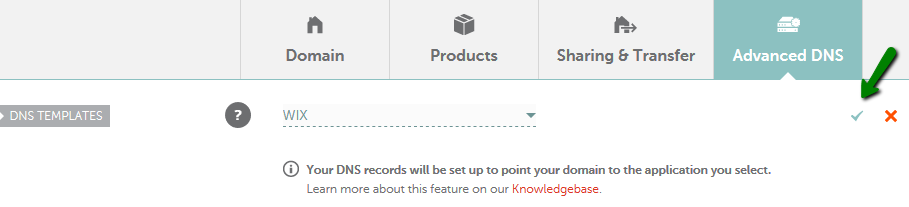
6. Confirm these actions by clicking the Continue button:


PLEASE NOTE: Should this message appear, please contact our 24/7 Customer Support for further assistance.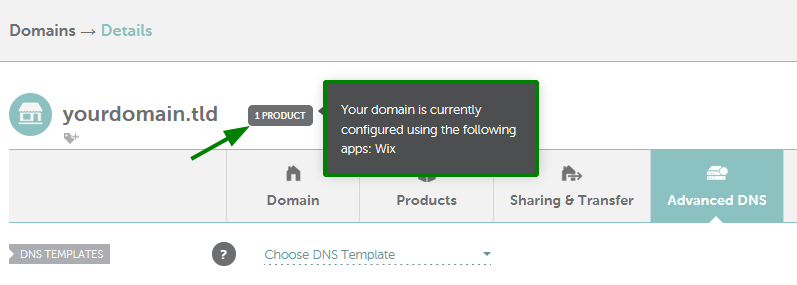
How To Change Your Wix Domain Name
Source: https://www.namecheap.com/support/knowledgebase/article.aspx/1247/2208/how-do-i-link-my-domain-to-my-wix-account/
Posted by: grosefoughurpite.blogspot.com
0 Response to "How To Change Your Wix Domain Name"
Post a Comment